
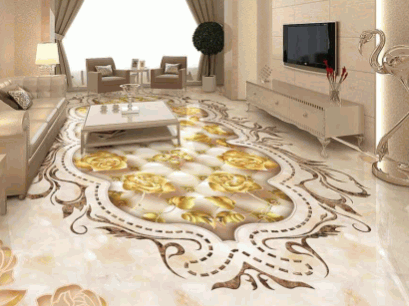
Epoxy floor design has become a popular choice for both residential and commercial spaces due to its durability, easy maintenance, and aesthetic versatility. In this comprehensive guide, we will delve into the world of epoxy floor design, exploring the materials needed, and the process of preparation, execution, and maintenance.
From understanding the components of epoxy resin and hardener to learning the step-by-step techniques for creating stunning designs, we've got you covered. Whether you're a DIY enthusiast or a professional contractor, this article will equip you with the knowledge and skills to transform any floor into a stunning epoxy masterpiece. So, let's explore the art of epoxy floor design and discover how to bring your vision to life.

What Is Epoxy Floor Design?
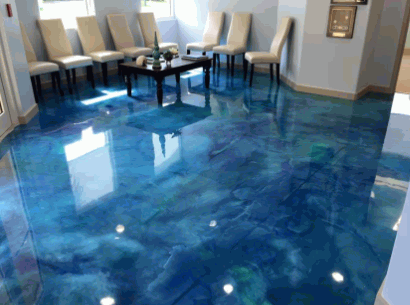
Epoxy floor design involves the application of a durable resin to create a seamless, glossy, and protective coating over the existing floor surface.
This type of flooring is known for its high durability and resistance to stains and chemicals, making it an ideal choice for industrial and commercial spaces. In addition to its practical benefits, epoxy floors offer a sleek and modern aesthetic, enhancing the overall appearance of any space. They come in a variety of design options, including metallic and 3D effects, as well as a wide range of color choices to complement different interior styles.
The installation of epoxy floors requires specific techniques and preparation, which can be optimized through professional tips and specialized application techniques for a flawless finish.
What Are The Materials Needed For Epoxy Floor Design?
To embark on an epoxy floor design project, a comprehensive set of materials is essential to ensure proper preparation, application, and desired effects.
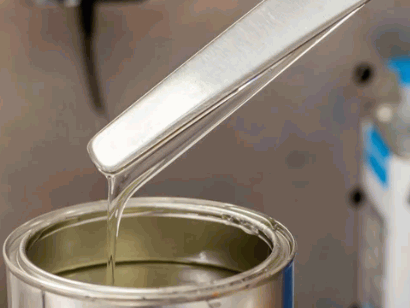
What Is Epoxy Resin?
Epoxy resin serves as the primary component in epoxy floor design, providing a strong, protective coat that undergoes a curing process to form a resilient sealant over the existing floor.
This versatile material not only offers exceptional durability and resistance to chemicals and abrasion but also enhances the aesthetics of the floor. Its curing process, typically involving a combination of resin and hardener, results in a tough, glossy finish that can withstand heavy foot traffic and various environmental stressors. Epoxy resin creates a seamless, easy-to-clean surface that minimizes dust, dirt, and moisture buildup, making it an excellent choice for industrial and commercial flooring applications.
What Is Hardener?
The hardener, when combined with epoxy resin, initiates the curing process, leading to the formation of a durable and resilient coating as part of the epoxy floor design.
It plays a crucial role in the mixing process, as it catalyzes the chemical reaction between the resin and hardener, resulting in a transformation from a liquid to a solid state. This interaction is essential for the material to achieve its full strength and adhesion to the substrate. The hardener also contributes to the curing and hardening of the epoxy, creating a seamless and long-lasting surface that is able to withstand heavy foot traffic, impact, and various other environmental stresses in commercial and industrial settings.
What Are The Tools Needed?
Epoxy floor design demands a set of specialized tools for the application, finishing, and leveling of the epoxy resin, along with safety precautions to ensure a successful and secure installation process.
Among the essential tools required for epoxy floor design are:
- A good quality roller or squeegee for applying the epoxy resin evenly on the surface.
- A mixing paddle and drill for thoroughly blending the epoxy components.
- A spiked shoe system is necessary for walking on the wet epoxy without leaving footprints to ensure a smooth finish.
- A notched trowel is also indispensable for leveling the epoxy during the application process.
It is imperative to wear appropriate protective gear, including gloves, safety goggles, and a respirator to safeguard against exposure to harmful fumes and chemicals.
How To Prepare The Floor For Epoxy Design?
Proper preparation of the existing floor is crucial for the success of an epoxy floor design project, involving meticulous surface preparation, adequate ventilation, and thorough cleaning to ensure optimal adhesion and longevity of the epoxy application.
Step 1: Clean The Floor
The initial step in preparing the floor for epoxy design involves a thorough cleaning process to remove any dirt, debris, or contaminants that could compromise the adhesion of the epoxy resin.
This cleaning process is crucial to ensure a strong bond between the epoxy and the floor surface. Dust, oil, and any other impurities must be completely removed to achieve a smooth and clean surface.
One effective method is to use a vacuum cleaner or a broom to eliminate loose particles, followed by a thorough mopping with a degreaser or a solution of warm water and mild detergent. Once the floor is clean and dry, any cracks or imperfections should be addressed to ensure a flawless surface for the epoxy application.
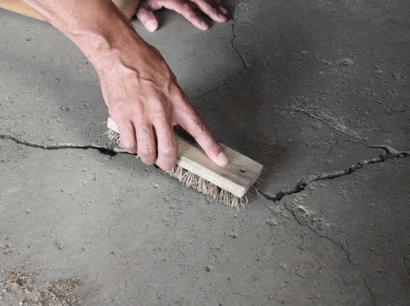
Step 2: Repair Any Cracks Or Holes
Addressing cracks or holes in the existing floor is crucial as part of the preparation process for epoxy design, requiring meticulous repairs to ensure a uniform and seamless finish during the application of epoxy resin.
The first step in identifying and repairing these imperfections involves a thorough inspection of the floor surface. Look for any visible cracks, holes, or uneven surfaces that may disrupt the application of epoxy. Once identified, the next step is to carefully prepare the area for repair. This may involve cleaning out debris, removing any loose material, and applying a suitable filler or patching compound to create a smooth and level foundation. Ensuring a properly repaired and smoothed surface is essential for the successful adhesion and durability of the epoxy coating.
Step 3: Sand The Floor
Sanding the floor is a critical step in the preparation process for epoxy design, ensuring an even and textured surface that promotes optimal adhesion and long-term durability of the epoxy resin.
It is essential to start with a coarse-grit sandpaper to remove any existing finish or imperfections on the floor surface. Once the initial rough sanding is complete, progressing to finer grits smoothens the surface, creating the perfect foundation for the epoxy application.
Achieving a thoroughly sanded surface ensures that the epoxy can adhere uniformly, prevent bubbles and peeling, and enhance the overall aesthetic appeal of the floor.
How To Create Epoxy Floor Design?
The process of creating an epoxy floor design involves a series of meticulous steps, including the application of epoxy resin, the utilization of various techniques for unique patterns and colors, and the critical curing and sealing stages to ensure a pristine and enduring finish.
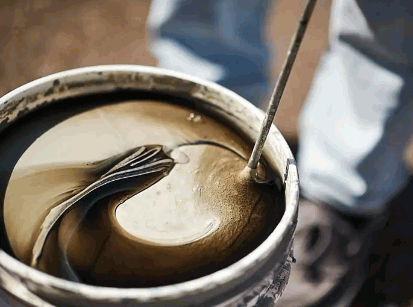
Step 1: Mix Epoxy Resin And Hardener
The initial step in creating an epoxy floor design involves the precise mixing of epoxy resin and hardener, initiating the curing process that is essential for the formation of a resilient and durable coating.
This crucial step demands accurate measurement and mixing of the epoxy resin and hardener in specific ratios, as even the slightest deviation can impact the curing process and compromise the final outcome. The meticulous combination of these components sets the stage for the chemical reaction, transforming the liquid mixture into a hard, glossy surface that can withstand heavy foot traffic and other environmental stressors. Therefore, ensuring the proper mixing and curing of the epoxy is fundamental to achieving a flawless and long-lasting floor design.
Step 2: Add Pigment (Optional)
For those seeking customized colors and patterns in their epoxy floor design, the addition of pigment provides the opportunity to create unique and visually appealing finishes.
The incorporation of pigment into the epoxy mixture allows for an endless array of color options, from vibrant and bold hues to subtle and elegant tones. By experimenting with different pigment combinations, individuals can tailor the flooring to complement the overall aesthetic of their space. The strategic use of pigments can enable the creation of intricate patterns and designs, transforming the floor into a stunning work of art. This optional step not only enhances the visual appeal but also opens up a world of creative possibilities, making each installation a one-of-a-kind masterpiece.
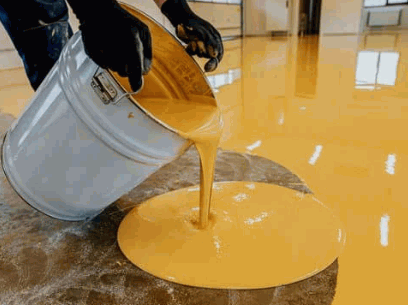
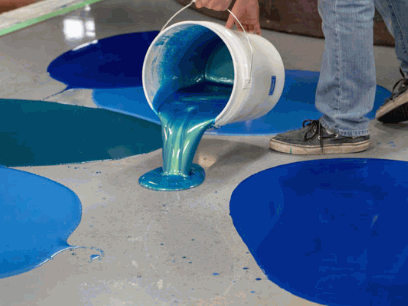
Step 3: Pour The Epoxy Mixture Onto The Floor
Carefully pouring the epoxy mixture onto the prepared floor surface marks a crucial stage in the installation process of an epoxy floor design, requiring precision and attention to achieve a uniform coating.
The key to achieving a seamless finish lies in the even distribution of the epoxy mixture. By starting at one corner and working methodically across the surface, ensuring each area receives an equal amount of the mixture, the uniformity of the coating is maintained. As the epoxy is poured, using a smooth, controlled motion aids in preventing any lumps or uneven patches. This process sets the foundation for the subsequent smoothing and leveling, guaranteeing a flawless epoxy floor installation.
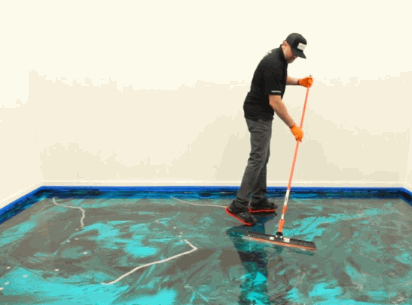
Step 4: Spread The Epoxy Mixture
The process of spreading the poured epoxy mixture across the floor surface demands specific techniques to ensure even coverage and seamless integration, requiring attention to leveling and uniformity.
This involves using tools such as squeegees, rollers, or trowels to spread the epoxy evenly, working methodically to avoid any bubbles or uneven patches. Achieving a seamless finish requires smooth and precise movements, carefully addressing any areas that may need extra attention. It's also essential to maintain a consistent thickness throughout the application process, ensuring that the epoxy layer is uniform across the entire surface. Proper leveling techniques play a crucial role in achieving professionally polished and durable epoxy flooring.
Step 5: Add Designs (Optional)
Those seeking unique and creative expressions in their epoxy floor design have the option to incorporate personalized designs or patterns during the installation process, enhancing the visual appeal of the finished floor.
This optional step allows individuals to truly make a statement with their flooring, whether it's through intricate geometric patterns, custom logos, or even artistic representations. By adding these personalized touches, the epoxy floor can become a canvas for self-expression, showcasing the individual's creativity and personality.
From sleek and modern designs to playful and vibrant patterns, the possibilities are endless, making each floor a truly one-of-a-kind creation that reflects the unique style and vision of the homeowner or designer.

Step 6: Let The Epoxy Cure
After the application and design stages, allowing the epoxy to cure is essential for the development of its inherent durability and the realization of the desired finish, marking a critical phase in the overall floor design process.
During the curing process, the epoxy undergoes chemical changes, transforming into a strong, resilient surface that can withstand heavy foot traffic, impacts, and chemical spills, ensuring long-lasting performance. Upon completion, the cured epoxy floor not only exhibits a glossy, seamless appearance but also provides a protective shield against stains, abrasion, and moisture, enhancing the aesthetics and functionality of the space.
The curing stage ultimately plays a vital role in ensuring that the epoxy floor achieves its full potential in both durability and visual appeal.
How To Maintain Epoxy Floor Design?
Maintaining the pristine quality of an epoxy floor design involves regular cleaning, the application of protective coats, timely repairs, and adherence to specific maintenance guidelines to ensure its enduring beauty and functionality.
Explore: How To Remove Resin From Concrete Floor
Regular Cleaning
Regular cleaning routines are essential for preserving the pristine appearance and protective qualities of an epoxy floor design, ensuring its longevity and visual appeal.
Without proper cleaning, dirt, grime, and spills can accumulate on the surface, compromising its durability and aesthetic charm. By regularly sweeping and mopping the floor, you can prevent dirt buildup and maintain its glossy finish.
Using gentle cleaning agents and avoiding harsh chemicals is crucial to safeguard the protective coat of the epoxy, ensuring it remains resilient against everyday wear and tear. Consistent maintenance not only prolongs the lifespan of the epoxy floor but also promotes a healthier and more inviting environment for occupants.
Avoid Harsh Chemicals
Avoiding harsh chemicals and abrasive substances is imperative for the sustained preservation of an epoxy floor design, protecting its protective coat and aesthetic appeal from potential damage.
Over time, exposure to harsh chemicals can compromise the integrity of the protective coat, leading to discoloration, chipping, or dulling of the surface. By steering clear of such substances, one can prolong the longevity and preserve the original luster of the epoxy flooring, ensuring a visually striking and durable solution for commercial and residential spaces.
Repair Any Damage Immediately
Timely repair of any damage or wear and tear is essential for the sustained integrity and visual appeal of an epoxy floor design, ensuring its continued functionality and aesthetic allure.
Ignoring repairs can lead to further deterioration of the epoxy floor, compromising its durability and safety. Cracks or chipped areas, if left unattended, can expand, making the floor susceptible to more extensive damage.
Prompt repairs contribute to maintaining a seamless and flawless appearance, enhancing the overall ambiance of the space. Regular upkeep and immediate attention to repairs play a critical role in prolonging the lifespan and quality of epoxy flooring, ultimately preserving its value and attractiveness.
Apply A Protective Coating Every Few Years
Applying a protective coating every few years is a prudent practice to enhance the durability and longevity of an epoxy floor design, safeguarding its aesthetic appeal and protective qualities.
This regular application of protective coatings acts as a shield, protecting the epoxy floor from wear and tear, scratches, and stains, ultimately extending its lifespan. These coatings contribute to the flooring's overall wellness by preventing moisture penetration and inhibiting the growth of mold or mildew, creating a healthier indoor environment.
The application of protective coatings can bring out the natural luster of the epoxy, elevating its visual appeal and making it easier to maintain cleanliness and hygiene.