Are you looking to refresh your space by removing old wallpaper but worried about damaging the plaster underneath?
In this article, we will discuss the importance of stripping wallpaper and provide a step-by-step guide on how to do it without causing harm to your walls.
We will also share essential tools you need for the job, offer tips for success, and highlight common mistakes to avoid.
Keep reading to learn how to tackle this DIY project with confidence!
Discover: What Paint To Use On Plaster Walls
Why Strip Wallpaper?
Removing wallpaper can give your walls a fresh new look and is a popular DIY home improvement project. Whether you want to update your decor or prepare for a new paint job, stripping wallpaper is the first step.
One of the biggest benefits of wallpaper removal is how it can instantly enhance the aesthetics of your living space. By eliminating outdated or damaged wallpaper, you create a blank canvas that allows you to redefine the look and feel of a room.
Stripping wallpaper is crucial for properly preparing walls for a new coat of paint. Removing the old paper ensures a smooth and clean surface for paint application, resulting in a professional finish.
Engaging in a wallpaper removal project can also bring a sense of accomplishment and satisfaction. It's a tangible task with visible results, making it a rewarding DIY endeavor that many homeowners enjoy. Sources like Real Homes and MSN Lifestyle often feature inspiring stories of successful wallpaper removal transformations, providing motivation and guidance for those looking to tackle similar projects.
What Tools Do You Need?
To successfully strip wallpaper, you'll need specific tools such as a wallpaper scraper, steamer, sponges, and buckets. These tools are essential for efficiently removing wallpaper without damaging the underlying plaster or walls.
It's crucial to have the right tools like a wallpaper scraper to carefully lift and peel off the wallpaper. The steamer helps loosen the adhesive for easier removal, while sponges and a bucket are handy for cleaning up the residual paste.
Using improper tools can lead to unwanted dents in the walls or even cause damage to the plaster. By following expert advice from someone like Mike Katona, a seasoned DIY home improvement enthusiast, you can ensure a smooth wallpaper removal process.
Wallpaper Stripper
A wallpaper stripper solution is a crucial tool for loosening wallpaper adhesive. You can create your own solvent using water and vinegar or purchase a commercial wallpaper remover. Ensure you have a spray bottle and polythene sheet for application and protection.
Using a wallpaper stripper significantly simplifies the wallpaper removal process, making it less time-consuming and more efficient. With a wallpaper stripper, the adhesive softens, allowing you to peel off the wallpaper effortlessly. DIY wallpaper stripping solutions are cost-effective and environmentally friendly options, while commercial removers are formulated for tougher adhesives and larger projects.
When applying the solution, fill the spray bottle with the mixture and liberally spray it onto the wallpaper. Cover the treated area with a polythene sheet to keep the solution from drying out, allowing it to penetrate the adhesive effectively.
It is crucial to prioritize safety when using a wallpaper stripper. Wear protective gear such as gloves and goggles to prevent skin and eye irritation. Ensure proper ventilation in the room to avoid inhaling fumes from the stripping solution.
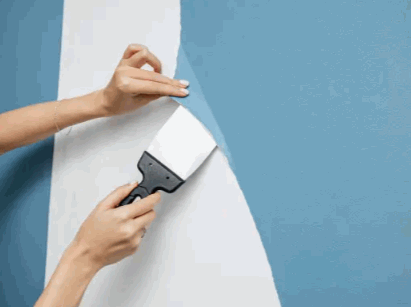
Scraper
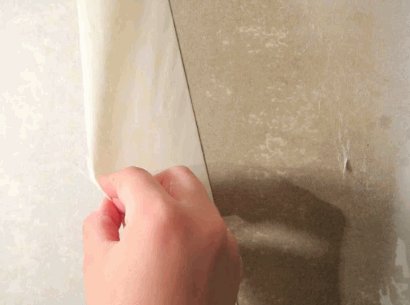
A wallpaper scraper is essential for removing wallpaper effectively. For dry-strippable wallpaper, a scraper allows you to peel off the wallpaper easily. You can also use a wallpaper scoring tool to create perforations for better removal.
Gently scraping with the scraper helps prevent damage to the wall surface underneath. By applying gentle pressure while using the scraper, you can carefully lift off the wallpaper without causing any harm to the walls. This technique is especially crucial when dealing with delicate or painted walls.
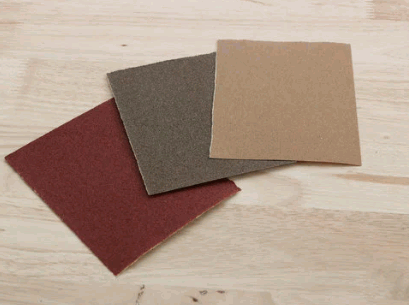
Sandpaper
Sandpaper is useful for smoothing walls after wallpaper removal, especially if there are imperfections or rough patches on plaster or lath walls. It helps create a clean surface for painting or applying new wallpaper.
When dealing with imperfections on plaster or lath walls, sandpaper plays a crucial role in refining the surfaces. By gently sanding the walls, you can smooth out any bumps, ridges, or uneven areas that may be present, ensuring a uniform finish. Proper sanding techniques are essential to avoid damaging the walls while achieving the desired smoothness.
Sandpaper allows you to remove any residue left behind by the wallpaper, ensuring that the wall is free of any remaining adhesive or paper fibers that could interfere with the new finish. It is a versatile tool that can be used to prepare various types of surfaces for different treatments, making it an essential asset in the renovation process.
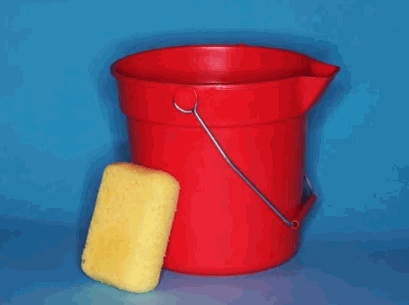
Sponge
Using a sponge and bucket with a vinegar solution can help clean residue and adhesive from walls after wallpaper removal. The sponge allows for gentle scrubbing without damaging the wall surface.
How To Strip Wallpaper Without Damaging Plaster?
Stripping wallpaper without damaging plaster requires careful preparation and the right tools. By following specific steps and using a wallpaper remover solvent, you can safely remove wallpaper without harming the underlying plaster.
- One crucial step in this process is to start by scoring the wallpaper with a scoring tool, allowing the solvent to penetrate effectively.
- Once the wallpaper is scored, apply the wallpaper remover solvent generously, ensuring it saturates the wallpaper. Let it sit for the recommended time to soften the adhesive.
Expertise from professionals like Mike Katona can provide valuable advice on the best techniques to employ. After the soaking time, gently peel off the wallpaper starting from a corner. Use a scraper or putty knife to aid in the removal, being careful not to gouge the plaster.
Prepare The Room
Before starting the wallpaper removal process, ensure the room is adequately prepared. Wear safety goggles and have a safety kit at hand to protect yourself from any potential hazards during the removal process.
It is crucial to create proper ventilation in the room by opening windows or using a fan to ensure proper air circulation.
Remove any furniture or items that could obstruct your movement during the process.
Cover the floors with dust sheets to protect them from adhesive residue.
Secure electrical sockets and switches with tape to prevent any water damage.
Ensure that the walls are clean and free of any obstacles before commencing the wallpaper removal.
Test The Wallpaper
Before proceeding with the removal process, test a small section of the wallpaper to determine its type and adhesion. Use a wallpaper scraper to assess how easily the wallpaper peels off and adjust your technique accordingly.
By conducting this preliminary test, you can avoid potential damage to the underlying surface and ensure a smoother removal process. When using a wallpaper scraper, pay attention to whether the wallpaper comes off in large strips or tiny bits, as this can indicate the type of adhesive used. If the wallpaper peels off effortlessly, it likely has a water-based adhesive, whereas resistance may mean a stronger adhesive or multiple layers.
Score The Wallpaper
To facilitate wallpaper removal, consider scoring the wallpaper with a wallpaper scoring tool. This process creates perforations that allow the removal solution to penetrate effectively. Use plastic sheeting to protect the floor and furniture.
Scoring the wallpaper before removal offers multiple benefits beyond just aiding in the removal process. By creating small holes in the wallpaper surface, the scoring tool allows the removal solution to reach underneath the wallpaper more efficiently, ultimately making the entire removal process quicker and less strenuous.
Scoring the wallpaper helps prevent damage to the underlying wall surface as it reduces the chances of wallpaper tearing or leaving stubborn residues behind. This ensures a smoother and cleaner wall once the wallpaper is removed.
Using a wallpaper scoring tool is a cost-effective solution as it can significantly reduce the time and effort required for wallpaper removal, minimising the need for expensive professional services.
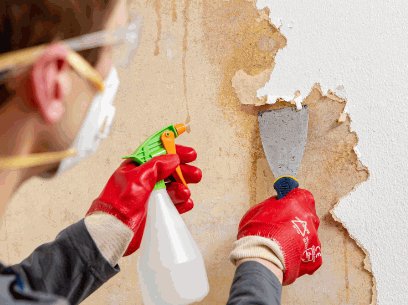
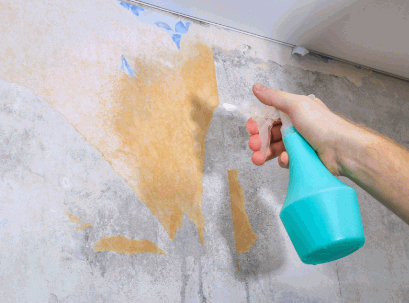
Apply Wallpaper Stripper
Once the wallpaper is prepared, apply the wallpaper stripper solution using a sponge or spray bottle. Ensure the solution saturates the wallpaper thoroughly to loosen the adhesive for easier removal.
To effectively apply the wallpaper stripper solution, start by filling a spray bottle with the solution and adjusting it to a fine mist.
Next, thoroughly saturate the wallpaper surface with the solution, allowing it to penetrate the adhesive.
For larger areas, a sponge can be dipped into the solution and gently applied in sections. It is crucial to let the solution sit for the specified time to fully break down the adhesive bond, making the wallpaper removal process more efficient and less labour-intensive.
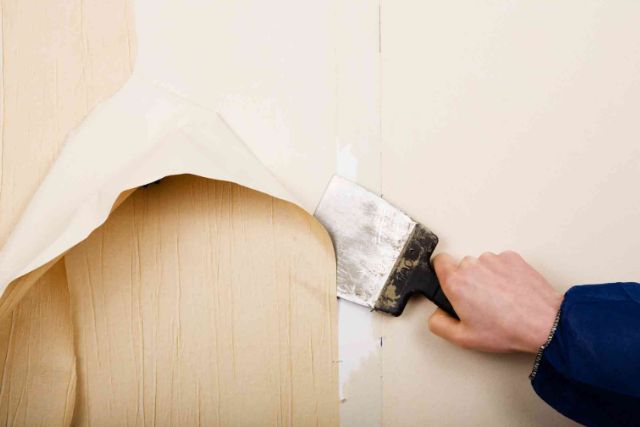
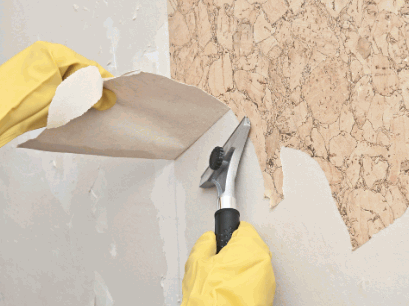
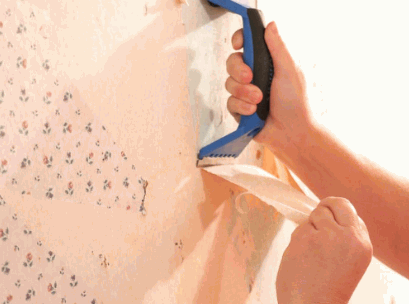
Scrape The Wallpaper
Using a wallpaper scraper, gently peel off the loosened wallpaper from the walls. Take care to avoid damaging the plaster or underlying walls by using light pressure and following safety precautions.
When employing a wallpaper scraper, it's crucial to approach the task with a gentle touch. The key is to exert just enough force to lift the wallpaper without causing harm to the surface beneath. Applying excessive pressure can lead to unsightly blemishes, requiring additional repair work later on. Ensuring that you wear protective eyewear and gloves can safeguard against any potential injuries during the scraping process.
- Remember, safety always comes first when engaging in home improvement projects like wallpaper removal.

Sand The Walls
After removing the wallpaper, sand the walls with glasspaper to create a smooth surface for painting or reapplying wallpaper. Follow specific instructions to achieve the desired wall finish.
- Start by selecting the appropriate grit of glass paper; a medium to fine grit is usually suitable for this task.
- Begin the sanding process by moving the glass paper in a circular motion, focusing on areas with residue or bumps from the wallpaper removal process.
Once the initial sanding is complete, use a sanding block or pole sander to ensure an even surface. Pay close attention to corners and edges to avoid any uneven texture.
- Continue sanding until the walls feel smooth to the touch, as this is crucial for a professional-looking outcome.
- Take breaks to inspect your progress and make any necessary adjustments before proceeding.

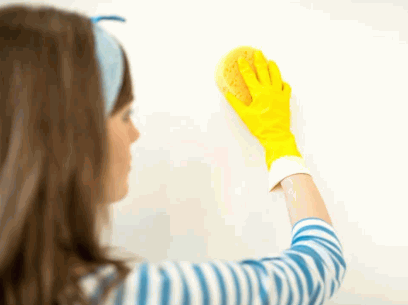
Clean The Walls
Once the walls are sanded, clean them using a sponge and vinegar solution to remove any remaining residue or adhesive. Ensure the walls are free of debris before proceeding with painting or applying new wallpaper.
It is crucial to prioritize the cleanliness of the walls post-sanding as any leftover residue or adhesive can adversely affect the final finish of the new application. Utilising a vinegar solution combined with the gentle scrubbing action of a sponge is an effective and natural way to thoroughly clean the walls.
By ensuring that the walls are entirely free of any debris, the surface becomes optimal for the next decor application, whether it's a fresh coat of paint or a new wallpaper design. This meticulous cleaning process not only enhances the aesthetics of the room but also promotes better adhesion and longevity of the new decor.
What Are Some Tips For Stripping Wallpaper Without Damaging Plaster?
When stripping wallpaper without damaging plaster, consider using a steamer or fabric conditioner to help with wallpaper removal. These methods can help loosen the adhesive and make the process smoother.
Using a steamer is particularly effective in softening the wallpaper adhesive, allowing for easier removal without the risk of damaging the underlying plaster walls. Fabric conditioner mixed with water can provide similar benefits, while also leaving a pleasant scent in the room.
It's important to remember to wear safety glasses when working with a steamer to protect your eyes from potential steam burns. Having a safety kit on hand, which includes gloves and a face mask, can further prevent any injuries during the wallpaper removal process.
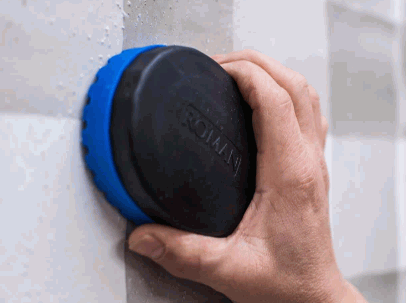
Use A Steamer
A steamer is a practical tool for removing stubborn wallpaper. The steam helps to loosen the adhesive, making it easier to peel off the wallpaper without causing damage to the plaster or walls.
One of the main advantages of using a steamer for wallpaper removal is its efficiency in softening the adhesive, which reduces the effort needed to scrape off old wallpaper. This method is not only time-saving but also minimizes the likelihood of causing any harm to the underlying surface.
Following safety precautions when using a steamer is crucial to prevent accidents or injuries. Wearing protective gear such as gloves and goggles, ensuring proper ventilation in the room, and being cautious around hot steam are essential steps to take for a safe wallpaper removal process.
Use Fabric Softener
Fabric conditioner can be an alternative technique for wallpaper removal. By mixing fabric conditioner with water, you can create a solution that helps break down the adhesive, allowing for easier wallpaper stripping.
Creating the fabric conditioner solution is a simple process. Start by mixing 1 part fabric conditioner with 3 parts warm water in a bucket or spray bottle. Stir or shake the solution well until it is thoroughly blended.
The fabric conditioner works by penetrating the wallpaper and adhesive, softening them to make removal less labour-intensive and to prevent damage to the underlying surface.
Protect The Floors And Furniture
Before starting the wallpaper removal process, cover floors and furniture with polythene sheeting to protect them from debris, water, or adhesive. This precaution ensures your surroundings remain undamaged during the project.
Polythene sheeting acts as a barrier between the workspace and your valuable surfaces, preventing any accidental spills or splatters from causing harm. It also facilitates easy cleanup after the removal is completed, saving you time and effort in restoring your space.
A clean and safe workspace is essential for efficiency and your own well-being during the task. By safeguarding your floors and furnishings with this simple yet effective method, you create a stress-free environment where you can focus solely on wallpaper removal without worrying about potential damages.
What Are Some Common Mistakes To Avoid?
Avoiding common mistakes during wallpaper removal is crucial to prevent damage to walls or potential safety hazards. By following proper techniques and safety precautions, you can ensure a successful and safe wallpaper removal process.
One of the common mistakes to avoid is not using proper safety gear like gloves and safety glasses. Wearing protective gear is essential to prevent injuries from sharp tools or harmful chemicals. Neglecting safety precautions such as not turning off electrical sources before starting the removal process can lead to accidents.
To avoid damaging the walls, it's important to follow instructions carefully. Reading and understanding the manufacturer's guidelines will help you avoid applying excessive force or using the wrong tools, which can result in wall damage.
Not Preparing The Room
One common mistake to avoid is not adequately preparing the room before starting the wallpaper removal process. This oversight can lead to safety hazards or damage to walls if safety precautions are not followed.
Before embarking on the task of removing wallpaper, it is essential to take the necessary steps to ensure a safe and successful process.
Room preparation plays a crucial role in this, as it sets the foundation for the entire project. Clearing the space of any furniture or obstacles not only provides you with ample working room but also minimizes the risk of accidents or damage during the removal process. Protecting the floors with dust sheets or plastic sheeting prevents any debris or adhesive from causing harm.
Using Too Much Force
Another mistake to avoid is using excessive force when stripping wallpaper. Applying too much pressure can damage the walls or spread adhesive, making the removal process more challenging.
When excessive force is applied during wallpaper removal, it can result in not only aesthetic damage to the walls but also practical issues such as the spread of adhesive residue. The force can cause the wallpaper to tear unevenly, leaving behind patches that are difficult to remove. The force can create dents or punctures in the walls, requiring extra repair work and expenses.
If the adhesive beneath the wallpaper spreads due to excessive force, it can seep into the wall material, making it harder to remove the remaining wallpaper and leaving a sticky residue that is tough to clean.
It is vital to handle the stripping process with gentle and controlled actions to prevent these issues and ensure a smoother wallpaper removal experience. By taking your time and using the right tools with a gentle touch, you can achieve a clean wall surface without causing unnecessary damage or complications.
Not Testing The Wallpaper
Neglecting to test the wallpaper before removal is a common mistake. Testing helps determine the type of adhesive and the ease of removal, allowing for the adoption of suitable removal techniques.
By testing the wallpaper, one can avoid potential damage to the underlying surface. Understanding the wallpaper type is crucial as different wallpapers require unique removal approaches. For instance, vinyl wallpapers may need steaming for successful removal, while traditional paper wallpapers could be more easily peeled off with a scoring tool. Such insights gained through testing can save time and effort during the removal process.
Not Sanding The Walls
Skipping the step of sanding walls after wallpaper removal is a mistake as it can lead to uneven surfaces or imperfections. Proper sanding ensures a smooth finish for painting or applying new wallpaper.
Sanding walls post-wallpaper removal is crucial to achieve a flawless end result. Sanding helps to address any remaining glue residue, rough patches, or uneven areas left behind after removing the wallpaper. It creates a uniform surface, providing the ideal foundation for the next step in your wall renovation process.
In terms of sanding, employing the right techniques is key. Begin with a coarse sandpaper to eliminate any stubborn residue, then progress to finer grit sandpaper to smoothen the surface further. Be thorough in your sanding, focusing on areas that may need extra attention to achieve a seamless finish.
Not Cleaning The Walls Properly
Failing to clean the walls properly after wallpaper removal can result in residual adhesive or debris, affecting the application of new decor. Thorough cleaning ensures a pristine surface for subsequent painting or wallpapering.
The residue left on walls can interfere with the adhesion of new wallpaper or paint, leading to an uneven finish. Proper cleaning preparation is essential for achieving professional-looking results that enhance the overall aesthetic of a room. Neglected residue may cause bubbling or peeling of the new wallpaper, compromising its longevity.
When tackling wall cleaning post-wallpaper removal, consider using warm water with a mild detergent. A soft sponge or cloth can be employed to gently scrub away any remaining adhesive or debris. For stubborn residue, a solution of vinegar and water can be effective without damaging the wall surface.