When it comes to garden fencing, there are a few things to keep in mind. Here, we'll provide you with information and tips to ensure a successful installation.
First, measure the perimeter accurately. This helps you know how much materials to get. Select the right fence for your needs, such as wooden or metal. Gather the necessary tools and materials, like posts, panels/pickets, concrete, nails/screws, and tools like a post-hole digger and level.
Mark the locations of each post according to your measurements. Dig the holes and position the posts. Pour concrete to secure them firmly. When it's dry, attach the panels/pickets to the posts using nails/screws. Make sure they are straight and level. Add any finishing touches, like paint or stain. Regular maintenance will keep it looking great.
Before installing, check local regulations. This ensures your fence meets legal requirements and avoids conflicts. With these guidelines and precautions, you can create a beautiful and secure garden fence.
Explore: Can Fence Paint Be Used On Garden Furniture
Gathering Materials And Tools
Gather up the stuff you need to install your garden fence! Here's a step-by-step guide:
- Measure the area of your garden with a tape measure.
- Work out how many fence panels you need with this measurement.
- Buy the panels, plus posts and gates if you need them.
- Get post-hole diggers or a power auger to dig holes for the posts.
- You'll also need a level, shovel, gravel, concrete mix, screws/nails, and a saw (in case you need to cut panels).
For convenience, buy extra materials in case of any mistakes/replacements.
Remember to take into account any details specific to your garden or environment before you start installing.
So get ready and get your materials and tools - enhance your outdoor space with security and privacy!
Choosing The Right Location For The Fence
Choosing the spot for your garden fence is key to its success and to making your property look amazing. Here are some points to note:
- Check out your land limits and decide where you want the fence. Take into account privacy, safety, and any areas you need to fence in or protect.
- Check with local government or homeowners' associations for any laws or permits needed for installing fences. Note any limits on height, materials, or placement.
- Notice the natural elements such as trees, bushes, and slopes. These could affect the fence's stability and durability, so pick a place that eliminates damage or conflicts.
- Think about the reason for your fence and how it'll work with other landscaping elements. Will it act as a backdrop for plants or be attractive on its own? Select a spot that fits your overall garden design.
When designing your garden fence, there are more details to consider. Choose a material based on your needs; wood for a rustic look or vinyl for less effort. Plus, think about putting in gates to make it easy to move in and outside the fenced area.
To make an inviting and safe outdoor space, make sure to pick the best place for your garden fence. Look at your property boundaries, rules, natural elements, and overall design. This way, you can have a successful installation and improve both the function and looks of your garden.
So, you know why it's important to choose the right spot for your garden fence. Don't wait any longer and start making your dream outdoor retreat. Explore different places on your property, think of all the factors we discussed, and begin organizing your fence installation. Your perfect outdoor oasis is ready!
Preparing The Ground
- Get rid of any objects on the ground where you'll install your fence, such as rocks, vegetation, or debris.
- Measure and mark the boundaries of your fence with a measuring tape and stakes. Accurately double-check your measurements before continuing.
- Dig post holes at regular intervals along the marked boundary with an auger or post-hole digger. Make sure the depth of the holes is suitable for the height of your fence panels.
- Check the ground's level between each post hole with a level tool. If needed, add or remove soil to get it properly aligned.
- Fill about one-third of each hole with gravel for drainage and stability.
- Firmly pack down the soil around the posts with a tamper or a block of wood.
Don't forget to think about local regulations, property lines, and utility lines when prepping the ground for your fence.
Ancient civilizations have been aware of the importance of preparing the ground before installing fences for centuries. For example, the Egyptians used to dig trenches and build ditches for practical or symbolic purposes in their gardens or agricultural lands.
Setting The Posts
To install a garden fence, you need to set the posts in the ground. Follow these 4 steps:
| Step | Instructions |
|---|---|
| 1 | Dig Holes: Use a post-hole digger or auger to make holes. The depth should be one-third of the post's total length. |
| 2 | Place Posts: Put each post into its hole. Make sure they are straight and aligned properly. You may use a level or string. |
| 3 | Add Concrete: Fill up the hole two-thirds full with concrete mix. Add water according to the manufacturer's instructions. Centre and level the posts before compacting the concrete. |
| 4 | Curing: Allow enough time for the concrete to cure. This usually takes 24 hours. Don't put stress on the posts until they are cured. |
Also, check local regulations for fence height and setback requirements before starting.
Pro Tip: Use a wood preservative on the posts before setting them in concrete. This will make them last longer and prevent rotting.
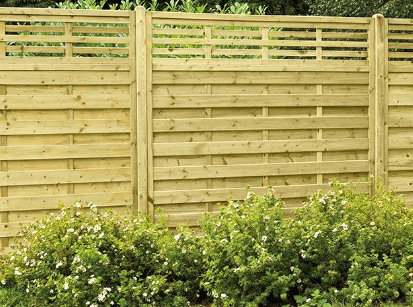
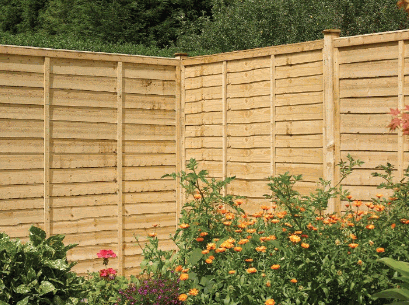
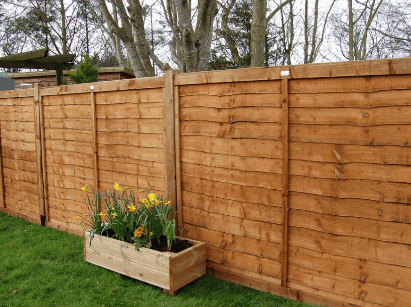
Attaching The Fence Panels
Position each panel along the fence line, making sure they are level and evenly spaced. Fasten them securely with sturdy screws or nails, from top to bottom.
For extra stability, consider installing diagonal braces on the back of each panel. This will prevent sagging later.
Remember, a well-attached fence panel is key for privacy and protection. As a tip, apply a layer of wood preservative or paint to protect against moisture damage and make it last longer.
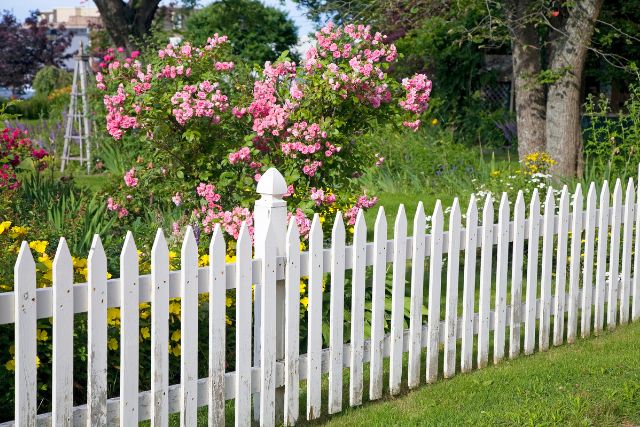
Adding Finishing Touches
To ensure a durable fence, remember these factors:
| 1. Install a sturdy gate for access and security. |
| 2. Enhance the fence with decorative elements like finials or postcaps. |
| 3. Paint or stain the fence to protect and beautify it. |
| 4. Seal any gaps or cracks with weatherproofing materials. |
| 5. Integrate the fence seamlessly into the landscape. |
| 6. Consider lighting for safety and ambiance. |
With these finishing touches, your garden fencing project will be complete with finesse!

Maintenance Tips For A Long-Lasting Fence
Maintaining your garden fence is a must for keeping it in perfect condition. Three tips to accomplish this are:
- Inspect your fence for any signs of damage like loose boards or rusted metal. Fix or replace them quickly.
- Clean the fence often to make sure it looks good and to prevent debris from causing decay.
- Apply a sealant or stain to protect the wood from the elements and extend its life.
It's important to also consider that certain fences need special care. Read the manufacturer's instructions or ask a professional to help out.
A crucial factor in fence upkeep is trimming nearby plants. Homebase states that too much vegetation can cause pressure and harm the fence in the long run.
Conclusion
Exploring all the steps to install a garden fence? It needs careful planning and execution. Follow the guidelines in this article! It'll help you set up a sturdy and nice-looking fence.
Choose the right materials for a long-lasting fence. Opt for weather-resistant materials like treated wood or metal panels. This reduces maintenance needs.
Think about the height of your fence. Want privacy and security? A higher fence does the job. Lattice designs and ornamental caps make it look good.
Installation techniques are vital. Use cement or concrete footings at each post location. Diagonal bracing strengthens the structure and stops warping.
Maintenance is essential. Apply protective coatings or stains. Inspect for loose screws or damaged sections. Nip any potential issues before they get worse.