
Your window sills are looking dirty and uncared for? Not sure how to make them shine like new? In this article, we will guide you through the process of cleaning your window sills step by step using basic tools and materials you probably already have at home. From getting rid of loose dirt to scrubbing off tough grime, we've got it all covered. Stay tuned for some useful tips on keeping your window sills clean and bid farewell to dusty ledges once and for all!
What Tools And Materials Do You Need?
To effectively clean your window sills, you will need a set of essential tools and materials that ensure a thorough job.
- A microfibre cloth is a crucial tool for wiping away dust and grime without leaving behind streaks or lint.
- A hoover with a brush attachment helps to remove any accumulated dirt and debris from hard-to-reach corners.
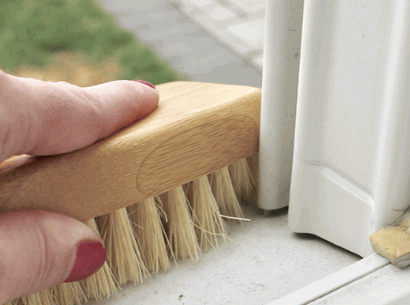
- A scrubbing brush comes in handy for tackling tough stains that may have built up over time.
- Using a mixture of soapy water and vinegar in a bucket provides a powerful yet gentle cleaning solution that is safe for most surfaces.
Together, these items play a vital role in maintaining the cleanliness and appearance of your window sills.
Check out: How To Pressure Wash A Roof
Cleaning Solution
The cleaning solution plays a crucial role in eliminating dirt, grime, and bacteria from your window sills, ensuring a sanitary and fresh environment.
Using an effective cleaning solution for your window sills not only removes visible dirt and grime but also targets harmful bacteria that can accumulate in these areas over time. By regularly disinfecting and cleaning your window sills, you are not just improving the appearance of your living space but also enhancing the overall hygiene levels. The impact of a well-chosen cleaning solution extends beyond aesthetics, as it actively contributes to creating a healthier environment for you and your family.
Microfiber Cloth
A high-quality microfibre cloth is ideal for wiping down your window sills, ensuring a spotless finish and effective dust removal.
Microfibre cloths are highly regarded for their ability to trap dirt and dust particles efficiently due to their unique structure, which includes thousands of tiny fibers.
When cleaning your window sills, it's essential to use a clean and dry microfibre cloth to prevent streaks or residue from being left behind. To achieve optimal results, lightly dampen the cloth with water or a mild cleaning solution before wiping the sills. Remember to wipe in a gentle, circular motion to avoid pushing dirt around or causing scratches on the surface.
By incorporating microfibre cloths into your regular cleaning routine, you can maintain sparkling clean window sills with ease.
Vacuum Cleaner
A hoover with appropriate attachments helps in removing dust accumulation, allergens, and pests from your window ledges, ensuring thorough cleaning.
The suction power of a hoover plays a vital role in effectively removing fine dust particles and debris that tend to settle on window ledges. By creating a strong suction force, the hoover not only lifts and collects visible dirt but also eliminates hidden allergens that can trigger respiratory issues. Pests like spiders, ants, and mites that often find shelter in window ledges are swiftly removed with the help of the hoover attachments, aiding in pest control within the household. This proactive approach ensures a hygienic environment and minimizes the risk of pest infestations and allergen-related health problems.
Scrub Brush
A sturdy scrubbing brush is essential for scrubbing away mold, mildew, tough stains, and embedded grime from your window ledges, ensuring thorough cleanliness.
Its durable bristles and tough design make it a reliable cleaning tool, capable of removing even the most stubborn residues. With a good scrubbing brush, you can easily tackle those hard-to-reach corners and crevices where mold and mildew tend to hide, ensuring a deep and effective clean. Its ergonomic handle allows for a firm grip, making the scrubbing process more efficient and less strenuous. Say goodbye to unsightly stains and hello to pristine window ledges with the power of a quality scrubbing brush.
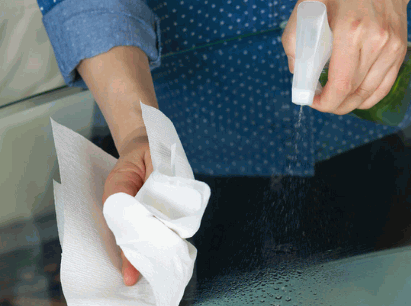
Paper Towels
Using kitchen rolls for cleaning spills and wiping surfaces on your window ledges provides absorbent and disposable convenience for quick cleaning tasks.
The absorbent nature of kitchen rolls allows them to efficiently soak up liquids and wipe away dirt or grime, making them an essential tool for maintaining cleanliness in your home.
Their disposability means you can easily discard them after use, reducing the risk of cross-contamination and ensuring a hygienic cleaning process. The convenience of having a stack of kitchen rolls readily available for any unexpected spills or cleaning needs makes them a versatile and practical choice for everyday household chores.
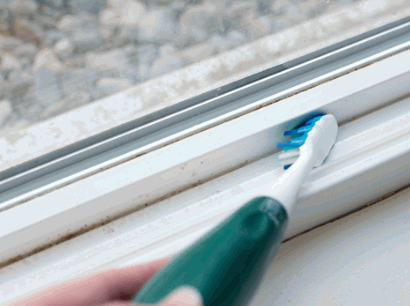
Toothbrush
A toothbrush serves as a versatile tool for detailing hard-to-reach areas, corners, and crevices on your window sills with precision and thoroughness.
The small bristles of a toothbrush can expertly navigate the intricate spaces of window sills, leaving no corner untouched. Its compact size allows for targeted cleaning, ensuring that even the tiniest crevices are free of dirt and grime. This precision cleaning is particularly useful for removing dust and debris that accumulate in hard-to-reach spots, where regular cleaning tools may struggle to reach. The toothbrush's ability to access these nooks and crannies makes it a handy companion for detailed cleaning tasks.
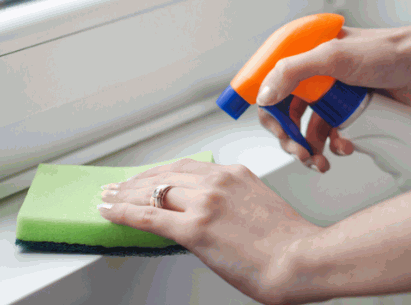
Sponge
A sponge is a versatile cleaning tool that can be used with soapy water for wiping and absorbing dirt from your window sills, ensuring effective cleaning.
The absorbent properties of a sponge make it particularly effective at soaking up liquids and dirt, making it an ideal choice for cleaning tasks. When paired with soapy water, the sponge not only removes grime but also leaves a streak-free finish on your window sills. Its soft texture allows for gentle yet thorough cleaning, ensuring that even hard-to-reach corners are free of dust and debris. The versatility of a sponge extends beyond window sills, as it can be used on various surfaces around the house, making it a handy tool to have in your cleaning arsenal.

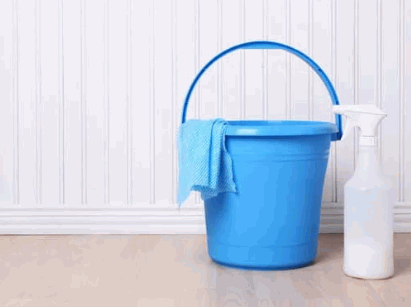
Bucket
A bucket is essential for carrying water, cleaning solutions, and other supplies needed for cleaning your window sills, providing convenience and portability.
It serves as a versatile tool, allowing you to transport all the necessary items in one place as you move from one window to another, eliminating the need for constant back-and-forth trips. With a sturdy handle and durable construction, the bucket ensures that you can easily maneuver around your space without any spillage. Its role in water containment not only simplifies the process but also minimizes the risk of accidents, keeping your cleaning solution secure until you're ready to use it.
Step-By-Step Guide To Cleaning Window Sills
Follow this detailed step-by-step guide to effectively clean your window sills, ensuring a sparkling and fresh appearance that enhances your home's interior design.
- Start by removing any loose debris or dust from the window sills using a soft brush or vacuum attachment.
- Next, create a cleaning solution with warm water and mild dish soap to wipe down the sills.
- For stubborn stains, consider using a mixture of vinegar and water.
- Don't forget to dry the sills thoroughly to prevent water damage and mold growth.
- Regularly cleaning your window sills not only improves the overall aesthetic of your space but also helps maintain a healthy indoor environment by reducing allergens and improving air quality.
Step 1: Remove Loose Dirt And Debris
The first step in cleaning window sills involves removing loose dirt and debris to prepare the surface for deeper cleaning and maintenance.
This initial cleaning step is crucial as it allows for a clean slate and ensures that the subsequent cleaning tasks are more effective. By clearing away loose dirt and debris, you are creating a smooth surface that is ready for thorough washing and disinfecting. Not only does this improve the overall appearance of the windows, but it also helps in maintaining a healthier indoor environment by reducing dust and allergens that can accumulate in these commonly overlooked areas. Taking the time to properly clean window sills sets the foundation for a more thorough and long-lasting cleaning process.
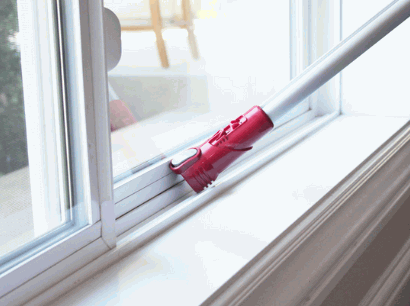
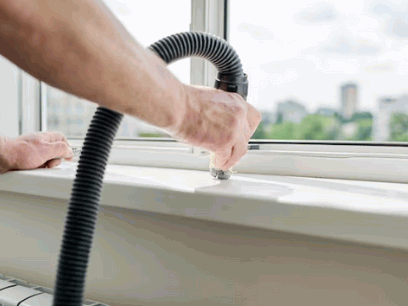
Step 2: Vacuum The Sill
Using a vacuum cleaner, thoroughly clean the sill to remove dust, allergens, and pests, ensuring a sanitized and pest-free surface.
- The process involves attaching the appropriate nozzle or brush attachment to the vacuum hose to effectively reach tight crevices and corners on the window sill.
- By running the vacuum along the entire length of the sill, you can ensure that all accumulated dust, dirt, and potential allergens are efficiently sucked up, leaving the surface clean and hygienic.
This method not only helps in maintaining a healthier indoor environment but also plays a significant role in pest control by eliminating food sources and habitats that attract insects and other pests.
Step 3: Prepare The Cleaning Solution
Create a potent cleaning solution by combining soapy water and vinegar for effective disinfecting and sanitizing of your window sills.
This simple yet powerful DIY solution offers a natural alternative to commercial cleaners, with vinegar acting as a disinfectant and soapy water helping to break down dirt and grime.
To prepare this mixture, start by filling a spray bottle with equal parts of water and vinegar, followed by adding a few drops of liquid soap. Shake the bottle gently to ensure the ingredients are mixed well. Before applying the solution, make sure to dust off any loose debris from the window sills to maximize the cleaning effectiveness.
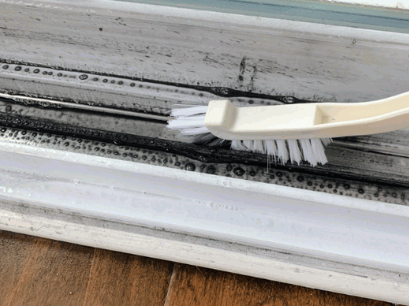
Step 4: Clean The Windowsill
Scrub the window ledge diligently to remove mold, mildew, and tough stains, ensuring a high level of cleanliness and thorough removal of contaminants.
The process of scrubbing window ledges is crucial for maintaining a hygienic home environment. Begin by using a scrubbing brush with firm bristles to target the mold and mildew, as these can be particularly stubborn to eliminate. Make sure to apply gentle, yet firm pressure while scrubbing in circular motions to dislodge any embedded grime. Pay close attention to the corners and crevices of the window ledge, where mold tends to accumulate. Rinse the scrubbing brush frequently and reapply a cleaning solution to tackle any persistent stains effectively.
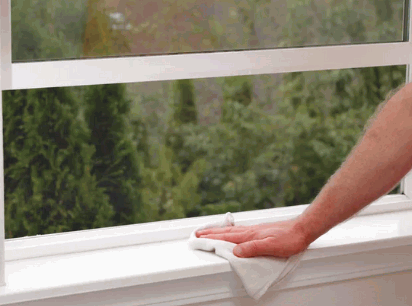
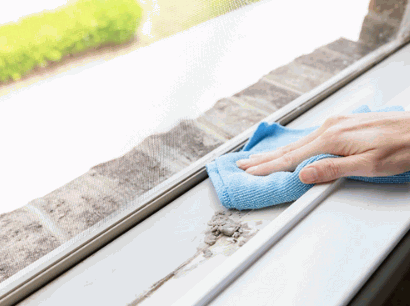
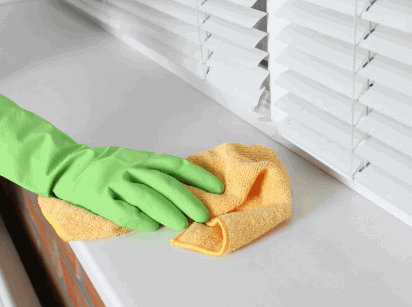
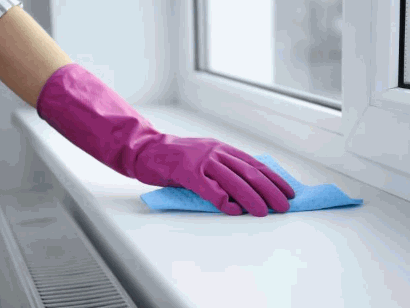
Step 5: Wipe Down With A Microfiber Cloth
Use a microfibre cloth to wipe down the sill, ensuring a spotless and dust-free finish that reflects thorough cleaning and attention to detail.
Microfibre cloths are especially effective in capturing and removing dust particles due to their fine fibers that trap dirt and grime with ease.
To achieve the best results, start by gently wiping the cloth along the window sill, making sure to reach into the corners and crevices where dust tends to accumulate. By using a light touch and a circular motion, you can lift debris off the surface without spreading it further.
For stubborn spots, slightly dampen the cloth with a mixture of water and mild detergent before wiping to ensure a deep clean and a gleaming finish.
Step 6: Clean Hard-To-Reach Areas With A Toothbrush
Utilize a toothbrush to clean hard-to-reach areas and intricate corners on the window sills with precision and detailed attention, ensuring a thorough cleaning.
By using a toothbrush, you can target those narrow and challenging spots that larger cleaning tools struggle to reach. The bristles of the toothbrush can be manipulated to navigate around crevices and edges effectively. To enhance precision cleaning, dip the toothbrush in a mixture of mild soap and water. Gentle circular motions combined with a firm but controlled hand can remove stubborn grime and dirt build-up. This method allows you to pay close attention to the details, ensuring every nook and cranny receives thorough cleaning.
Step 7: Rinse And Dry The Sill
After cleaning and scrubbing, rinse the sill with water and ensure thorough drying to complete the cleaning process and achieve a fresh and sanitized surface.
Rinsing the sill after cleaning is crucial to remove any remaining cleaning solution or residue, which could potentially attract dirt and dust if left unattended.
When rinsing, make sure to use clean water to avoid reintroducing any dirt onto the surface. Once the rinsing is complete, take a dry cloth or kitchen towel to carefully dry the sill.
Thorough drying is essential as it prevents water spots and streaks from forming, leaving the window sill looking spotless and gleaming.
Tips For Maintaining Clean Window Sills
Maintaining clean window sills is essential for fresh and inviting interior decor, and following a regular cleaning schedule ensures that your home benefits from proper ventilation and natural light.
Regularly wiping down window sills with a damp cloth or gentle cleaning solution not only removes dust and grime but also prevents mold and mildew buildup, which can impact indoor air quality.
In addition, keeping windows clean allows sunlight to filter through unobstructed, brightening up the space and creating a cheerful ambiance.
By incorporating window sill cleaning into your routine home maintenance, you can prolong the lifespan of both your windows and surrounding decor.